Arctic Cooling Silencer NV5 Rev. 3 GPU Cooler Installation *56k Warning*

I usually plan out the subject for my posts well in advance. But that was not the case with this post. Last week, a grinding sound began to emit from my main desktop. I assumed that it was the CPU fan without bothering to open the case, and ordered one from The Fan Van seller on eBay, who was recommended to me. When it promptly arrived, I opened the my desktop’s case . . . and it was not the CPU fan afterall.

It was the GPU cooler instead.

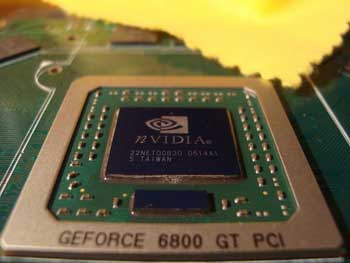
My Arctic Cooling Silencer NV5 Revision 3 is a replacement for the factory heatsink on my nVidia GeForce 6800 GT graphics card. It is compatible with all nVidia GeForce 6800’s and apparently 7800’s as well. So I scramble to find a replacement, and they are very hard to find. I was only able to find one place. Arctic Cooling has a 6 year warranty on this part and offered to replace it RMA. I needed one ASAP, so I ordered the one I found and shipped my old one to Arctic Cooling’s site in California for replacement. I guess I will sell the replacement whenever it arrives.

EDIT: 03/25 – Arctic Cooling did stick to their word and issued a replacement under warranty. Very Generous.

Now on to the installation.

But first, we will need some theme music . . .


Now we will actually get on with the installation . . .

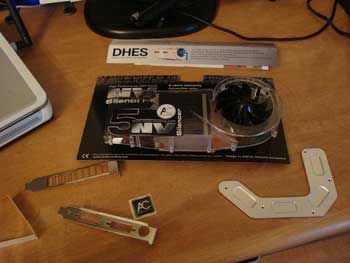
Arctic Cooling Silencer NV5 Parts

Arctic Cooling Silencer NV5 Parts


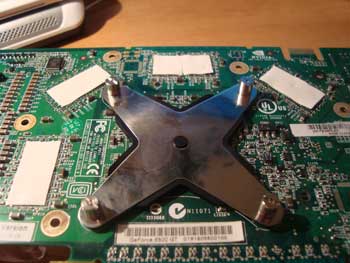
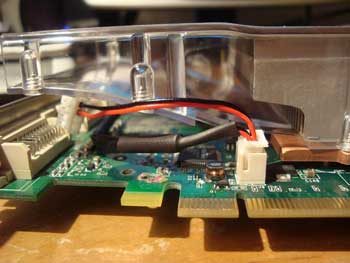
To remove the old one, you simply unscrew the four nuts holding the cooler to the card (Image 1), and unclip the fan cable (Image 2).


Image 1

Image 1

Image 2

Image 2


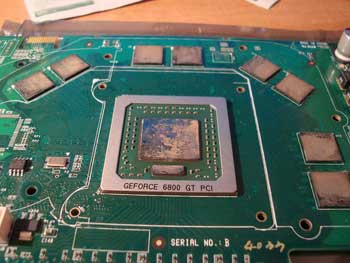
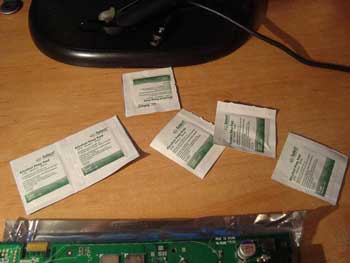
Next, clean off any residue on the GPU and other contact points with isopropyl alcohol and a lint-free cloth. (Images 4, 5, 6)


Image 3

Image 3

Image 4

Image 4

Image 5

Image 5


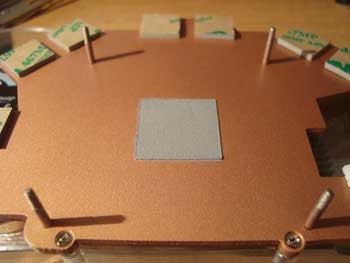
Luckily the GPU cooler comes with thermal compound already on it, but if it didn’t, I would use Arctic Silver 5 thermal compound.


Thermal Compound Already On It

Thermal Compound Already On It


Place the cooler flat on a table with the threaded pegs facing up. Then flip your graphics card so that the GPU is facing down. Align the four screw holes and carefully guide the pegs through them. Once they are through, reattach the metal x-plate rubber side down and screw on the four nuts (the supplied slot cover conveniently works as a flathead screwdriver).


Four pegs sticking through card

Four pegs sticking through card

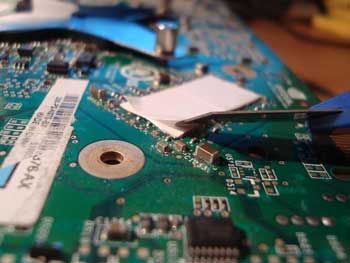
Finally, attach the remaining thermal pads on the backside of the card where the peripheral contact points are on the other side. Although it is dicey to be using a blade this close to the card, you will not be able to peel off the paper without one.


Thermal pads on backside

Thermal pads on backside

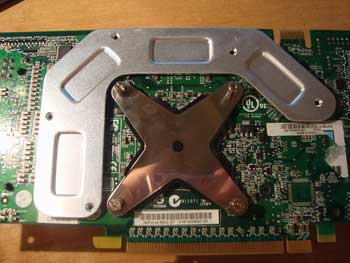
Then attach the passive heatsink by carefully pressing its four raised contact points against the thermal tape you just installed.


Passive heatsink on back

Passive heatsink on back

After all that, the card is ready to be installed in your computer. Be sure to plug the cooler’s fan cable into the graphics card before you close the case, or your fan will not have power.

By the way, this cooler takes up two slots in the back of the case, one for video ports and one for heat exhaust. This second slot is part of Arctic Cooling’s Direct Heat Exhaust System (DHES). This system is very efficient because it prevents the fan from recirculating warm air inside the case to cool the GPU. Overall, this is a very good cooler and it is unfortunate that the fan bearings in my original one went bad so early. Feel free to stop by my photo album of the entire project

Share

ConnectPro 2-port USB and PS/2 KVM Switch Review

ConnectPro 2-port USB and PS/2 KVM switch Pro-1 2UL

Unfortunately this KVM (Keyboard Video Mouse) switch does not get a glowing review due to some defects.

Features:
3 USB Inputs
One PS/2 Port
One VGA Output (to monitor)
Two VGA Inputs (from computers)
4 Status LEDs
Switch to deactivate PS/2 Keyboard
Large button on top to manually switch views
Hotkeys

You will need one open USB port on the back of each computer you wish to hook up to the switch for keyboard and mouse functionality.

The large button on top has been problematic, because it will sometimes get stuck between views if it has not be fully depressed (happens more times than you would think). The second issue is a transient one. The KVM switch decides to randomly switch views by itself. This could possibly be due to the counterintuitive hotkey configuration:

Left Control + Left Control + A = Switch to Next PC
Left Control + Left Control + 1 = Switch to Port 1
Left Control + Left Control + 2 = Switch to Port 2
Left Control + Left Control + <-- = Toggle Beep On/Off Left Control + Left Control + Function Key = Auto-scan F1 = 5 Sec F2 = 10 Sec F3: = 20 Sec F4: = 40 Sec F5: = 60 Sec I don't have two left control keys, do you? I'll concede that customer support was nice about correcting my misinterpretation of the configuration. You have to tap left control twice, not hold down the keys like a typical hotkey combination (Control + Alt + Delete, etc). If you have a sloppy typing style (such as myself), you may accidentally trigger it. Overall I was disappointed, but I'll live with it. It could be that mine is defective. For $43 shipped from Amazon.com, it was well priced. I can’t really afford the downtime to return it, so I’ll keep it around until it either gets worse or I upgrade to a DVI monitor.

Image courtesy of Amazon.com.

This is a sponsored review. If you would like to request a sponsored review, please do so here.

Share

Site Changes: Added OpenSearch, Ico file, and Amazon and Google Search Engines

This Linux weekend isnt all that bad. I am picking things up pretty quickly.

As you can see, there is now an ICO file for this website. You will see it next to the URL and in your bookmarks if you choose add it. It was very easy to make in GIMP. Additionally, I added OpenSearch compatibility. So if you have a built in searchbar on your browser, you can likely add this site as a search location from its drop down menu. Finally, I added a new page that contains my custom Amazon and Google search engines, and I will be referring to it in future posts when appropriate.

And, as always, I am tweaking small things behind the scenes that I am not happy with. For instance, you can actually now see the navigation menu for the pages of this site at top center above the content. So if something seems jacked up, it probably is my fault. Please shoot me an email to make sure that I am aware of it. Thanks.

Share

It is going to be a Linux weekend – Fedora 10 and Ubuntu

For various reasons, three of my computers are down. Two laptops are completely disassembled, and one desktop has the graphics card ripped out. While I am waiting on parts for one laptop and the desktop, I am left with computers running only Linux. I have one laptop with Ubuntu, and one desktop with Fedora 10. Ive been putting it off for some time now, but it looks like I am being forced to learn the ins and outs of these Linux distros.

Should be fun.

Share

Filezilla Make Me Into Angry Gorilla.

Filezilla FTP client will leave your material more chopped & screwed than a session with the venerable DJ Screw himself. I thought this was free, reliable, and light client until I started to transfer large files (the Pentagon Memorial images). They would either not upload at all, or not measure up (embarrassing). I wanted a client to use when transferring files that do not warrant awakening Dreamweaver.

Now on a serious note, without the lewd references, I cannot see myself trusting this software enough to upload my content. It could be my settings. It could be the large file sizes. It could be a lot of things. But before I come to a concrete conclusion and slander extensively, I will have to test everything to exhaustion.

But for now, I will be on the hunt for some new software.

Suggestions?

(Thanks for the flame tutorial http://www.rnel.net/tutorial/Photoshop/12588)

Share

Gender and Personality Type Assessments of Your Blog.

Here are two interesting links I came across. Uclassify.com alleges that you can determine both the gender and personality type of a site’s author by just entering the URL you want evaluated into their site.

Before this posting, this site is apparently 56% male and of an ESTJ Myers Briggs personality type.

Share